Introduction
You can clean a car interior without Armor All by using mild soap, water, microfiber cloths, a soft brush, and a cleaner made for the exact surface. Start with a dry vacuum, test every product in a hidden spot, use very little liquid, and wipe away residue before it dries.
This method works for most cars in the United States, from daily drivers and family SUVs to older used vehicles. It also helps avoid a greasy finish, strong scent, slippery steering wheel, or cloudy film on interior trim.
What You Need to Clean a Car Interior
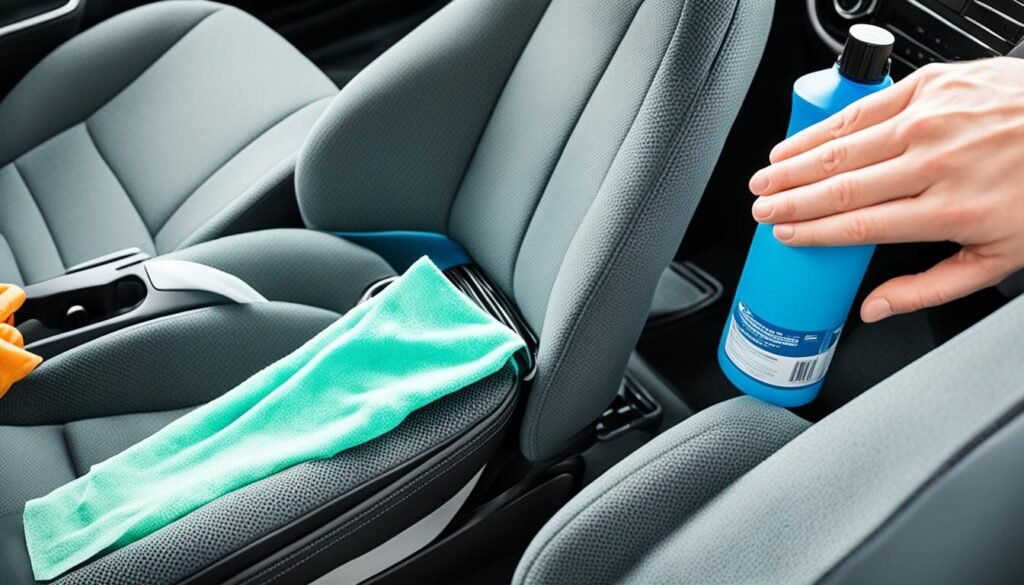
A simple cleaning kit is enough for most interior jobs. You do not need a dedicated dressing or shiny protectant.
Basic supplies
- Vacuum with a crevice tool
- Several clean microfiber cloths
- Two buckets or bowls
- Warm water
- Mild, unscented dish soap
- Soft interior brush or soft toothbrush
- Soft detailing brush
- Glass cleaner safe for tinted windows
- Upholstery cleaner for fabric seats and carpets
- Leather cleaner and leather conditioner for real leather
- Cotton swabs for vents and small gaps
- Paper towels for greasy spills or first-pass work
- Nitrile gloves
Use separate cloths for glass, seats, and dirty trim. A cloth that picked up grit can scratch glossy plastic or piano-black trim.
Check the owner’s manual first
Your car’s owner’s manual may give special care instructions for:
- Leather or synthetic leather seats
- Suede-like materials
- Touchscreens
- Heated or ventilated seats
- Soft-touch dashboards
- Natural wood trim
- Matte-finish plastic
- Seat belts
- Airbag panels
Automakers do not all use the same materials. A surface that looks like leather may be vinyl or coated synthetic leather. A shiny trim piece may have a delicate clear coating. The manual is the best source for material limits in your specific vehicle.
Why Clean a Car Interior Without Armor All?
Many people avoid Armor All because they dislike a shiny or slick finish. Some also prefer a simpler routine with fewer products.
A clean interior does not need to look wet. Dirt, dust, skin oil, food residue, and spills can be removed with a damp cloth and a suitable cleaner. Protectants are optional. They should never replace basic cleaning.
A low-sheen finish is often useful on high-contact areas. A slippery steering wheel, gear selector, pedal, or floor mat can affect control. For this reason, do not apply a dressing to the steering wheel, pedals, shifter, handbrake, or seat surfaces unless the vehicle maker specifically allows it.
The goal is simple: remove soil without leaving a film.
Step-by-Step: How to Clean the Whole Car Interior
Clean from the top down and from the least dirty areas to the dirtiest. This keeps dust and debris from falling onto areas you already finished.
1. Park in a safe, shaded place
Park on a level surface away from traffic. Open the doors and windows if weather and security allow.
Avoid cleaning in direct, hot sunlight. Heat can make cleaners dry too fast and leave streaks. It can also make plastic and glass too hot to touch.
Remove personal items, child seats, floor mats, trash, and loose papers before cleaning.
2. Take out and clean the floor mats
shake rubber mats outside. For heavy dirt, rinse them with water and scrub them with mild soap. Rinse well and let them dry fully before putting them back.
Vacuum carpet mats on both sides. Treat stains with a fabric-safe cleaner. Do not soak mats with thick backing, because trapped moisture can create odors or damage the floor beneath them.
Never reinstall a wet mat. A damp mat can contribute to mold or mildew growth and may slide under the pedals.
3. Vacuum before using liquid
Vacuum the seats, floor, carpets, door pockets, center console, and trunk area. Use the crevice tool around:
- Seat rails
- Stitching
- Cup holders
- Console gaps
- Door-jamb edges
- Under the seats
- Dashboard seams
- Vent openings
Use a soft brush attachment on vents, screens, and delicate trim. Do not press sand or grit into a touchscreen or glossy plastic.
Vacuuming first matters because wet dirt can turn into a paste. That paste is harder to remove and may spread across the surface.
4. Dust the dashboard and trim
Use a dry microfiber cloth or soft detailing brush to lift dust from the dashboard, instrument panel, center console, and door panels.
For stubborn dust, lightly dampen the cloth with water. Do not spray liquid onto the dashboard, vents, buttons, instrument cluster, or screen. Spray onto the cloth instead.
Wipe in one direction on textured surfaces. This helps move dust out of the grain rather than pushing it into the small grooves.
5. Make a mild cleaning solution
For most hard plastic, vinyl, and rubber trim, start with warm water and a clean microfiber cloth. If water alone does not remove the soil, add a small amount of mild dish soap to the water.
A practical starting mix is:
- About 1 teaspoon of mild dish soap in 2 cups of warm water
This is a light solution, not a strict formula. More soap does not mean more cleaning. Extra soap can leave a sticky film that attracts dust.
Dip the cloth into the solution, wring it out well, and wipe the surface. Follow with a second cloth dampened with plain water. Dry the area with a clean microfiber towel.
6. Clean the dashboard and doors
Use the mild solution on hard plastic, vinyl, and most rubber trim. Work in small sections.
Do not flood:
- Air vents
- Switches
- Speakers
- Instrument clusters
- Electrical controls
- Seat controls
- Airbag seams
Keep moisture away from the steering wheel hub and other areas that may contain airbags. A damp cloth is safer than spraying a product into a seam.
For deep texture, use a soft brush with very light pressure. Wipe away loosened dirt with a microfiber cloth before it dries.
7. Clean the steering wheel carefully
The steering wheel often holds more skin oil than any other interior surface. It may be leather, vinyl, rubber, or a coated material.
Start with a damp microfiber cloth. If the wheel still feels greasy, use a small amount of material-safe cleaner on the cloth. Wipe one section at a time, then remove residue with a clean damp cloth.
Dry the wheel completely. Do not apply a glossy dressing or oily product. The wheel should feel clean and dry, not slick.
If the wheel has peeling, cracking, or a sticky coating, cleaning may not fix the problem. The surface may need professional repair or replacement.
8. Clean the center console and cup holders
Remove loose debris with a vacuum or soft brush. Use cotton swabs or a small brush around buttons and seams.
For dried drink residue, place a lightly damp cloth over the spot for a short time. This softens the residue without pouring liquid into the console.
Wipe the area with a clean damp cloth, then dry it. Do not use a sharp tool that could cut the trim or damage a switch.
9. Clean the touchscreen and instrument display
Turn the screen off so you can see fingerprints and smears. Use a clean, dry microfiber cloth first.
If needed, use a cloth that is only slightly damp with water. Wipe gently without pressing hard. Do not spray glass cleaner, alcohol, ammonia, or household disinfectant directly onto the display unless the vehicle maker specifically approves it.
Some screens have coatings that can become cloudy or damaged by strong chemicals. Avoid paper towels on glossy screens because they may leave lint or fine scratches.
10. Clean fabric seats and carpets
Vacuum fabric seats before treating stains. Apply a small amount of fabric-safe cleaner to a cloth or soft brush rather than soaking the seat.
Blot stains from the outside toward the center. Scrubbing hard can spread the stain or roughen the fabric.
After cleaning, remove excess moisture with a dry towel. Leave the doors or windows open in a safe place until the fabric is fully dry.
Do not saturate seats that contain heating, cooling, or electrical parts. If a spill has reached deep into the seat, professional extraction may be safer.
11. Clean leather or synthetic leather seats
First identify the material if possible. Real leather, vinyl, and synthetic leather may need different products.
For coated leather or synthetic leather:
- Vacuum loose dirt.
- Put a small amount of leather-safe cleaner on a cloth.
- Wipe a small section.
- Remove residue with a clean damp cloth.
- Dry with a soft towel.
For real leather, use a cleaner labeled for automotive leather. A conditioner may help prevent a dry feel, but it is not always needed after every cleaning.
Do not use household furniture polish, cooking oil, petroleum jelly, or strong solvent on car seats. These products can leave grease, affect the finish, or make the surface harder to repair.
12. Clean the windows and mirrors
Use an automotive glass cleaner that is safe for tinted windows. Spray the cleaner onto a microfiber cloth instead of directly onto the glass.
Wipe the inside glass in one direction and the outside in another. This makes it easier to tell which side has streaks.
Use a second dry cloth to buff the glass. Keep cleaner away from the dashboard, speakers, leather, and electrical controls.
If the windshield has a greasy haze, clean it twice with fresh cloths. A dirty cloth can spread the film instead of removing it.
13. Remove odors at the source
Odor sprays often cover smells for a short time. Find and remove the source instead.
Check:
- Under the seats
- Floor mats
- Door pockets
- Cup holders
- Trunk area
- Cabin air filter
- Damp carpet
- Food spills
- Pet hair
Clean the affected area and dry it fully. If the smell returns, moisture may be trapped beneath the carpet or inside the ventilation system.
Do not mix cleaning chemicals. In particular, never mix bleach with ammonia or acidic cleaners. If an odor persists after cleaning and drying, a professional detailer or repair shop may need to inspect the carpet, HVAC system, or cabin filter.

Surface-by-Surface Cleaning Guide
Different materials need different levels of moisture and cleaning strength. Use the least aggressive method that works.
| Interior surface | First choice | Avoid |
|---|---|---|
| Hard plastic | Damp microfiber cloth; mild soap solution if needed | Abrasive pads, strong solvents |
| Vinyl | Water or vinyl-safe cleaner | Oily products on high-contact areas |
| Rubber trim | Damp cloth and mild soap | Petroleum-heavy products unless approved |
| Fabric seats | Vacuum and fabric-safe cleaner | Soaking, hard scrubbing |
| Carpet | Vacuum, blot, fabric cleaner | Trapping water under the carpet |
| Real leather | Leather-safe cleaner | Household polish, cooking oil |
| Synthetic leather | Mild cleaner labeled for the material | Solvents and excess water |
| Touchscreen | Dry or slightly damp microfiber | Direct spray, paper towels |
| Glass | Automotive glass cleaner | Overspray on trim and electronics |
| Seat belts | Mild soap and water, then air dry | Bleach, solvent, machine washing |
Matte and soft-touch trim
Matte trim should stay matte. Do not use a product designed to add shine.
Soft-touch surfaces can become sticky with age, heat, or chemical exposure. Use a damp cloth first. If the surface remains sticky, stop using stronger chemicals and check the vehicle maker’s instructions.
Piano-black and glossy trim
Glossy black trim shows fingerprints and fine scratches easily. Use a clean, soft microfiber cloth and light pressure. Never use a rough sponge or dry paper towel.
Seat belts
Pull the belt out slowly and hold it extended. Wipe it with mild soap and water, then let it air dry fully before retracting it.
Do not use bleach, harsh degreasers, or solvents. Do not machine-wash or iron the belt. A damaged or frayed seat belt should be inspected by a qualified technician.
What Can You Use Instead of Armor All?
You can use different products based on the soil and the surface.
For routine dust
Use a dry microfiber cloth or a slightly damp cloth. This is often enough for a lightly used interior.
For greasy fingerprints
Use mild soapy water on a cloth, followed by a clean damp cloth. This works well on many hard plastic and vinyl surfaces.
For fabric stains
Use an automotive upholstery cleaner made for the fabric. Test it in a hidden area first.
For leather
Use a cleaner labeled for automotive leather. Do not assume that a household leather product is safe for coated car leather.
For light protection
Protection is optional. If you want it, choose a low-sheen product made for the exact material and follow its label. Keep it away from steering wheels, pedals, shifters, and seat belts.
The best replacement for a shiny protectant is not always another protectant. Often, a clean damp cloth and proper drying give the finish you want.
Common Mistakes to Avoid
Using too much water
Water can enter seams, electronics, seat cushions, and carpet padding. Use a damp cloth, not a wet interior.
Spraying cleaner directly on surfaces
Direct spray can enter vents, switches, speakers, and screen edges. Spray onto the cloth unless the product label and vehicle manual say otherwise.
Using household glass cleaner everywhere
Glass cleaner may contain ingredients that are not suitable for leather, plastic, screens, or tinted film. Use it only on compatible glass surfaces.
Cleaning with one dirty cloth
A dirty cloth moves grit around. Fold the cloth into clean sections and switch to a fresh one when it becomes soiled.
Scrubbing too hard
Hard scrubbing can damage coatings, fabric, leather finishes, and soft-touch trim. Let the cleaner soften the soil first.
Using oils for shine
Cooking oil, mineral oil, and similar products can create a greasy film. They may also attract dust and make high-contact surfaces slippery.
Ignoring drying time
A car can look clean while hidden moisture remains under a mat or seat. Dry the interior well before closing the vehicle for a long period.

How to Tell Whether the Interior Is Clean
A properly cleaned surface should:
- Feel dry rather than greasy
- Have no visible soap film
- Show fewer fingerprints and smears
- Have no strong chemical smell
- Look natural for its original finish
- Leave no color on a clean white cloth after drying
If a surface still feels sticky, wipe it with a clean cloth dampened with plain water. If the stickiness remains, the material may be deteriorating rather than dirty.
If a stain remains, do not automatically use a stronger chemical. Identify the material and the stain first. Some stains require extraction, specialized treatment, or professional repair.
When to Use a Professional Detailer
Professional help makes sense when:
- Mold or mildew is present
- Water has soaked into carpet padding
- Milk, vomit, or another biological spill has reached deep into the interior
- Leather is cracked, peeling, or discolored
- A screen or electrical control was exposed to liquid
- A smoke odor remains after cleaning
- The headliner is sagging or stained
- The vehicle has valuable, rare, or delicate trim
A detailer can use extraction equipment and material-specific methods. For liquid inside electronics or airbag areas, a repair facility may be more appropriate than a detailing service.
FAQ
Can I clean my car interior with just soap and water?
For many hard plastic and vinyl surfaces, yes. Use a small amount of mild soap in warm water, apply it to a cloth, and wring the cloth out well. Follow with a clean damp cloth and dry the area.
Is vinegar safe for a car interior?
Vinegar is not a universal interior cleaner. It may affect some finishes, coatings, leather products, or delicate materials. Use a product made for the surface or begin with plain water and a mild soap solution.
How do I clean a car dashboard without making it shiny?
Use a dry microfiber cloth for dust, followed by a slightly damp cloth for residue. Avoid glossy dressings and wipe the surface dry. This leaves a more natural, low-sheen finish.
How do I remove a greasy film from the steering wheel?
Use a material-safe cleaner on a microfiber cloth. Wipe a small section, then remove residue with a clean damp cloth and dry the wheel. Do not use an oily protectant because it can make the wheel slippery.
Can I use household disinfectant wipes inside my car?
Only if the wipe label and vehicle manual allow it for that material. Disinfectant wipes can dry or discolor leather, damage coatings, and affect screens. Never use them on a surface simply because they are convenient.
How often should I clean my car interior?
Vacuum and wipe high-touch areas every few weeks or when dirt becomes visible. Clean spills at once. A full interior cleaning can be done as needed, based on use, passengers, pets, weather, and food carried in the vehicle.
Conclusion
The safest way to clean a car interior without Armor All is to use the mildest method that removes the soil: vacuum first, wipe with water or mild soapy water, use material-specific cleaners when needed, and dry every surface.
Keep liquid away from electronics, airbags, screens, and seams. Avoid oily products on the steering wheel, pedals, shifter, and seat belts. If a stain, odor, or damaged finish remains after careful cleaning, stop escalating the chemicals and use a professional service or the vehicle maker’s care guidance.