Connect the positive cable first, then connect the negative cable to safely complete the battery circuit.
Knowing the correct order to connect car battery cables helps prevent sparks, short circuits, damaged electronics, and personal injury. This guide explains the order to connect car battery terminals, the tools you need, safe jump-start steps, common mistakes, and special cases such as hybrid vehicles and cars with battery monitoring systems.

Why the Order to Connect Car Battery Matters
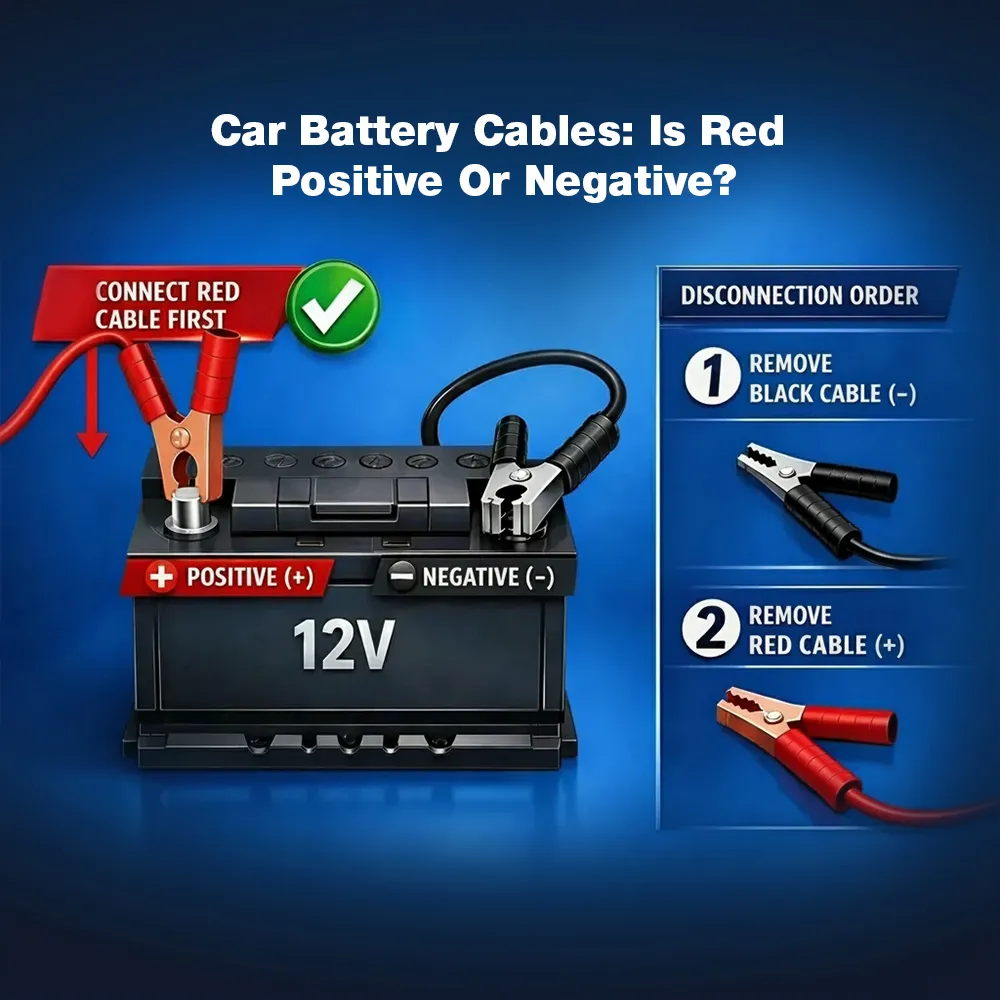
The correct order to connect car battery cables is positive first and negative second. This order reduces the chance of creating a short circuit while you work near the battery.
A car battery stores a large amount of electrical energy. Even a small metal tool can cause a strong spark if it bridges the positive terminal and the vehicle body. The car body is connected to the negative side of the electrical system, so touching both points at once can create a direct path for current.
When you connect the positive cable first, the negative circuit remains open. This lowers the risk of a short if your wrench touches a metal part of the car. After the positive cable is secure, connecting the negative cable completes the circuit in a controlled way.
For removal, the order is reversed:
• Disconnect the negative cable first.
• Disconnect the positive cable second.
This method protects you and reduces the risk of accidental grounding. It also follows common automotive service practice and battery safety guidance.

Tools and Safety Checks Before Connecting a Car Battery
Before following the order to connect car battery cables, prepare the work area. A few simple checks can prevent most battery problems.
You will usually need:
• Safety glasses
• Work gloves
• A correctly sized wrench or socket
• A battery terminal brush
• A battery hold-down tool, if needed
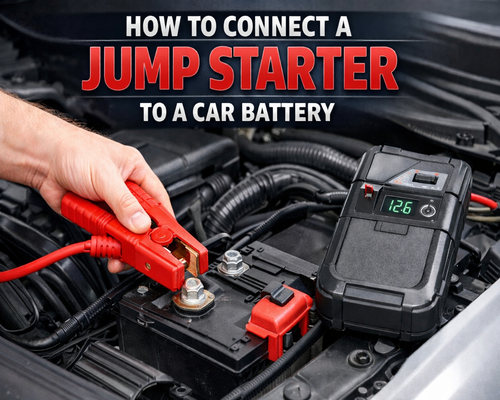
• A battery charger or jump starter, if the battery is weak
Park the vehicle on a flat surface. Set the parking brake and turn off the ignition, lights, radio, climate controls, and accessories. Keep cigarettes, flames, and sparks away from the battery because charging batteries can release flammable hydrogen gas.
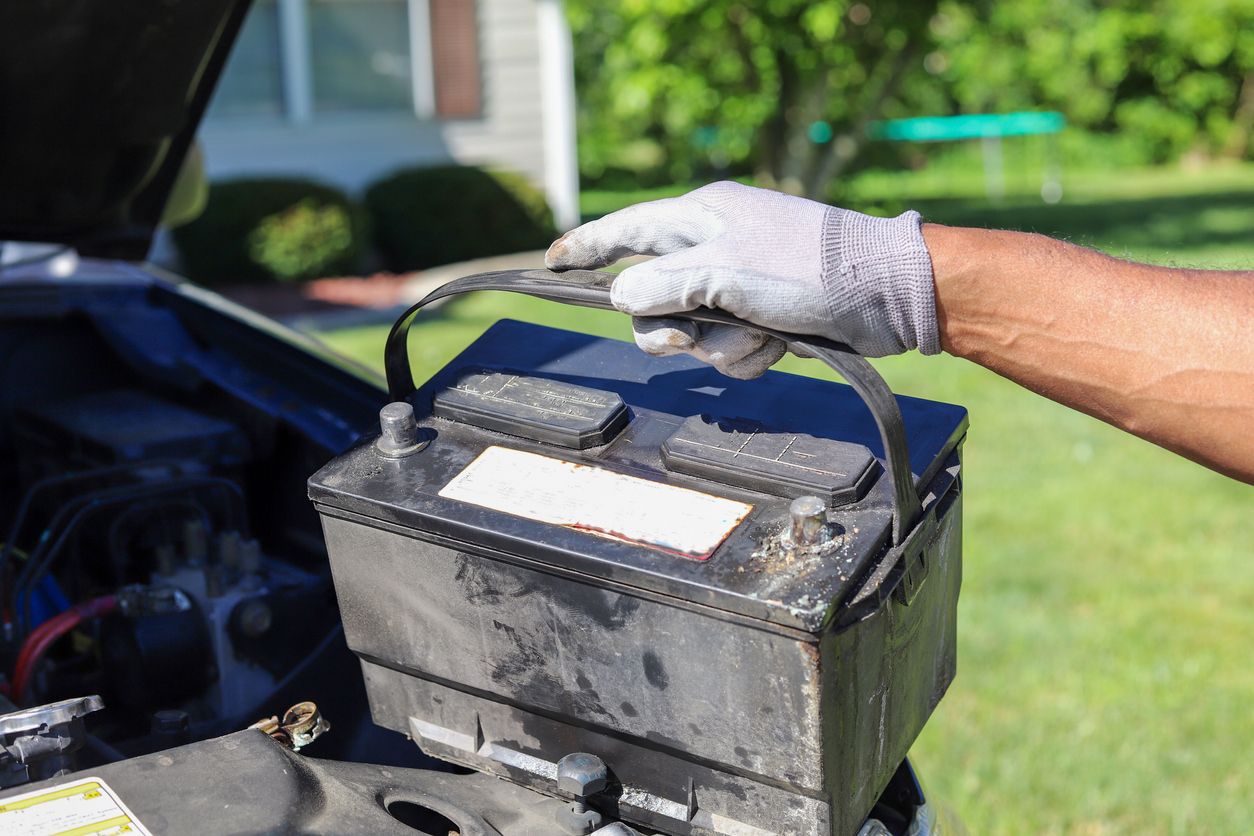
Check the battery case before you connect it. Do not use a battery that is cracked, badly swollen, leaking, or frozen. A damaged battery can fail suddenly and may release acid.
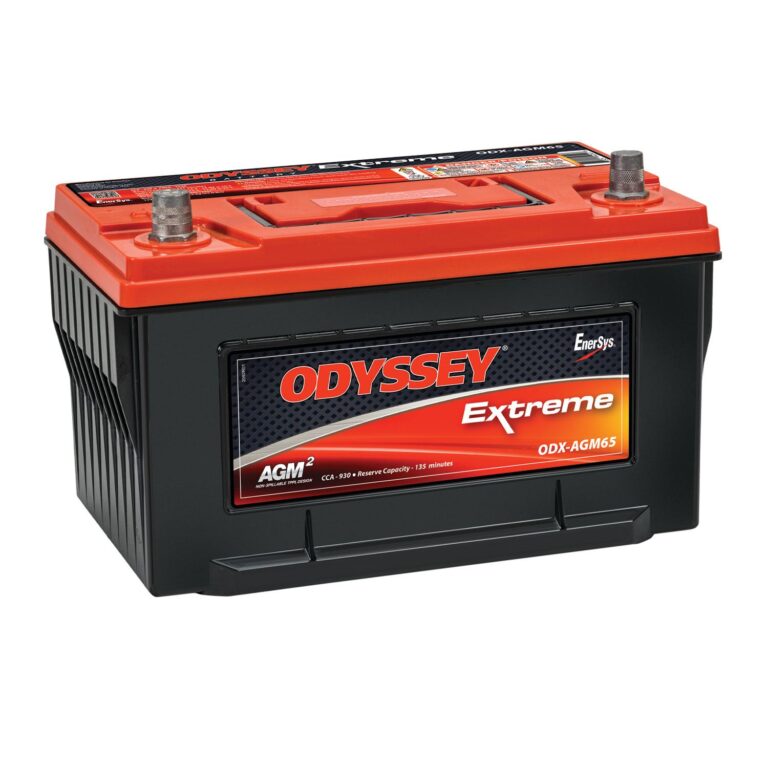
Also check the battery label. Confirm that the voltage, size, terminal position, and cold-cranking rating match the vehicle. Most cars use a 12-volt battery, but the physical size and terminal layout still matter.
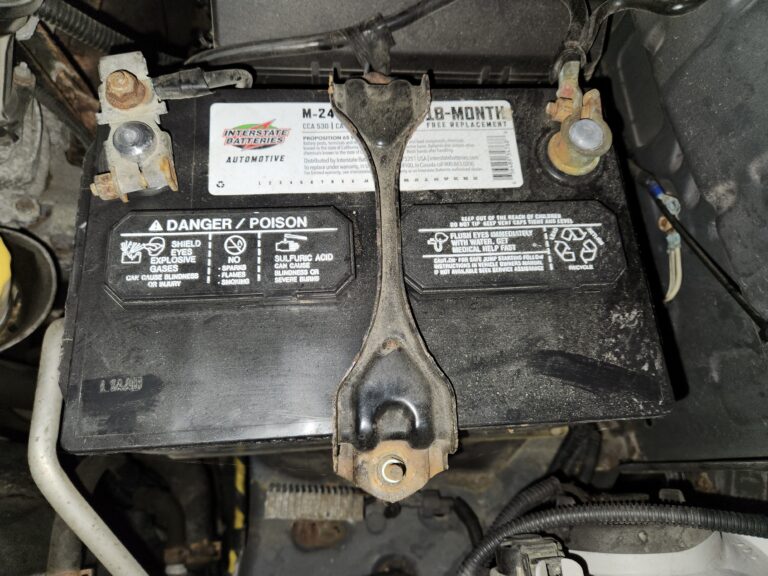
If the battery has corrosion, clean the terminals after disconnecting the old battery and before installing the replacement. A mix of white, blue, or green powder can block current and cause slow cranking.
The Correct Order to Connect Car Battery Terminals
The order to connect car battery terminals is simple. Take your time and identify each terminal before touching the cables.
Step 1: Confirm the positive and negative terminals
Look for the plus sign, or “+,” on the positive terminal. The negative terminal has a minus sign, or “−.” The positive cable is often red, while the negative cable is often black, but always use the markings as your final guide.
Do not rely only on cable color. Older vehicles may have faded insulation, replaced cables, or unusual wiring.
Step 2: Place the battery correctly
Set the battery into its tray with the terminals in the same position as the original battery. The battery should sit flat and should not lean.
Install the hold-down clamp or bracket before driving. A loose battery can move during turns and bumps. That movement may damage the case, cables, or terminals.
Step 3: Connect the positive cable first
Place the positive cable clamp over the positive battery post. Push it down fully, then tighten the clamp until it is snug.
Do not overtighten the terminal. Excess force can damage the battery post or strip the clamp. The cable should not twist or move when you gently test it by hand.
Step 4: Connect the negative cable second
Place the negative cable clamp over the negative battery post. Tighten it until secure, but avoid excessive force.
A tiny spark may occur when the negative cable first touches the terminal because some vehicle systems wake up. A large spark, smoke, heat, or a strong burning smell is not normal. Stop at once and check the cable positions.
Step 5: Check the connection
Try to move each cable gently. Both clamps should remain firm. Make sure no tool, cable, or loose metal part can touch both terminals.
This is the basic order to connect car battery cables for a replacement battery. A jump start uses a slightly different cable sequence, explained below.
How to Connect Jumper Cables Safely
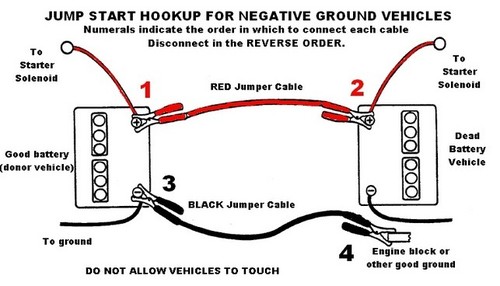
The order to connect car battery cables during a jump start is different from the simple battery installation sequence. You must connect the cables in a way that keeps sparks away from the weak battery.
First, park the donor vehicle close enough for the cables to reach, but do not allow the vehicles to touch. Turn both vehicles off and switch off all electrical accessories.
Use this jump-start sequence:
-
Connect the red jumper clamp to the positive terminal of the dead battery.
-
Connect the other red clamp to the positive terminal of the donor battery.
-
Connect the black clamp to the negative terminal of the donor battery.
-
Connect the other black clamp to an unpainted metal ground on the disabled vehicle, such as a solid engine block bracket.
-
Start the donor vehicle and let it run for a few minutes.
-
Try to start the disabled vehicle.
-
Remove the cables in reverse order.
Using a solid metal ground on the disabled vehicle can keep sparks away from the battery. Some manufacturers require a specific jump-start post, so check the owner’s manual when possible.
The removal order is:
• Remove the black clamp from the disabled vehicle.
• Remove the black clamp from the donor battery.
• Remove the red clamp from the donor battery.
• Remove the red clamp from the previously disabled battery.
Never allow the clamps to touch each other while connected. Also, do not jump-start a frozen, cracked, or leaking battery.
What to Do After Connecting the Battery
Starting the engine does not always finish the job. After following the order to connect car battery cables, inspect the vehicle and watch for warning signs.
Start the car and let it run for several minutes. The engine should crank at normal speed. Check for battery, charging system, engine, and electronic warning lights.
Some vehicles may lose stored settings when the battery is disconnected. You may need to reset:
• The clock
• Radio presets
• Power window auto function
• Seat memory
• Steering angle calibration
• Idle or throttle learning
Many newer vehicles use a battery monitoring sensor on the negative cable. The vehicle may need a battery registration or charging-system reset after replacement. This is common in cars with start-stop systems and advanced energy management.
If the battery warning light stays on, the alternator may not be charging correctly. A healthy charging system often measures about 13.5 to 14.8 volts while the engine runs, but the correct range depends on the vehicle and its charging strategy. Use the manufacturer’s specifications rather than relying on one universal number.
If the engine starts but struggles again soon, the battery may be weak, the terminals may be dirty, or the alternator may have a fault. A proper battery and charging test can identify the cause.
Common Mistakes When Connecting a Car Battery
Even experienced drivers can make mistakes when working quickly. These errors are easy to avoid when you understand the order to connect car battery cables.
Connecting the negative cable first
This is the most common mistake during battery installation. If your wrench touches the vehicle body while tightening the positive cable, it can create a short circuit.
Reversing the polarity
Connecting positive to negative can cause sparks, blown fuses, damaged modules, or battery failure. Always match the plus and minus signs before making a connection.
Leaving the ignition on
An active ignition system can draw current and create a spark when the cable is attached. Turn the vehicle off and remove the key before starting.
Using the wrong battery
A battery may fit physically but still have the wrong capacity, terminal layout, or technology. Vehicles with start-stop systems may require an AGM or EFB battery rather than a standard flooded battery.
Ignoring a loose terminal
A loose terminal can cause intermittent starting, flickering lights, stalling, or charging problems. Tighten the clamp and inspect for corrosion.
Forgetting the hold-down bracket
A battery that moves can damage its terminals and case. Secure it before driving, even if the engine starts normally.
Working without eye protection
Battery acid can cause serious eye injury. Safety glasses are inexpensive and should be part of every battery job.
A useful habit is to say “positive first, negative second” aloud before you begin. That small reminder helps prevent rushed mistakes.
Special Cases: Modern Cars, Hybrids, and Electric Vehicles
The order to connect car battery cables is suitable for many conventional 12-volt systems, but some vehicles need extra care.
Modern gasoline and diesel vehicles may contain sensitive control modules, electronic throttle systems, airbag systems, and battery monitoring sensors. Follow the owner’s manual when disconnecting or replacing the battery.
Start-stop vehicles often use AGM or EFB batteries. Installing the wrong type may shorten battery life or cause charging problems. Some models also require battery registration with a scan tool.
Hybrid and electric vehicles can contain high-voltage battery packs. Do not touch orange cables, high-voltage components, or service disconnects unless you are trained and authorized to work on them. The small 12-volt battery in these vehicles may power computers and contactors, but it does not make the high-voltage system safe to handle.
Some vehicles also have a remote positive terminal or a designated ground point under the hood. Use those points when the manufacturer provides them. They are often designed to support safe jump starting and battery testing.
If you are unsure, stop and check the vehicle manual or ask a qualified technician. A short repair delay is far safer than damaging an expensive control module.
How to Tell Whether the Battery or Alternator Is Bad
A battery problem and an alternator problem can feel similar. The vehicle may crank slowly, show dim lights, or fail to start.
Common signs of a weak battery include:
• Slow engine cranking
• Clicking when you turn the key
• Dim interior lights
• A battery that repeatedly loses charge
• A battery that is more than three to five years old
Common signs of a charging problem include:
• A battery warning light while driving
• Headlights that grow dim at idle
• A dead battery shortly after a jump start
• Electrical accessories that act strangely
• A burning rubber smell near the engine
A voltage test can offer a useful clue. With the engine off and the battery rested, a fully charged 12-volt battery often reads near 12.6 volts. A reading near 12.2 volts suggests partial discharge, while a much lower reading may indicate a deeply discharged or failing battery.
These numbers are general guides, not final proof. Temperature, recent driving, surface charge, and battery age can affect readings. A professional load test and charging-system test provide a better diagnosis.
Practical Tips for a Safer Battery Job
The best order to connect car battery cables is only one part of safe battery service. These habits make the work easier and more reliable.
• Take a photo of the original cable layout before removal.
• Keep the battery upright to reduce the risk of acid leakage.
• Cover the positive terminal while working near it.
• Do not place tools on top of the battery.
• Clean corrosion with a terminal brush and approved cleaner.
• Apply terminal protection after the clamps are tight.
• Never force a cable onto the wrong terminal.
• Keep children and pets away from the work area.
One practical lesson from many roadside repairs is that speed causes more trouble than the battery itself. People often grab a wrench before checking the terminal marks. A ten-second inspection can prevent a blown fuse, damaged sensor, or painful spark.
If the cable clamp will not tighten because it is stretched or cracked, replace the clamp. Do not use a loose washer, folded metal, or other improvised spacer as a permanent repair.
Frequently Asked Questions About the Order to Connect Car Battery
What is the correct order to connect a car battery?
Connect the positive cable to the positive terminal first. Then connect the negative cable to the negative terminal.
Which battery terminal should be connected first?
The positive terminal should be connected first when installing a battery. Connect the negative terminal second to reduce the risk of an accidental short circuit.
Which terminal should be disconnected first?
Disconnect the negative terminal first. After that, disconnect the positive terminal.
Can connecting a car battery backward damage the car?
Yes. Reversed polarity can cause sparks, blown fuses, damaged electronic modules, and battery damage. Stop immediately if the cables are connected incorrectly, and have the vehicle inspected.
Why does a spark happen when connecting the negative cable?
A small spark can occur as the vehicle’s computers and electrical systems receive power. A large spark, smoke, heat, or burning odor means something may be wrong, so disconnect the cable and check the connections.
Do I need to reset the car after connecting a new battery?
Some vehicles need clock, window, radio, steering, or battery-management resets. Cars with start-stop systems may also need battery registration with a scan tool.
Can I connect a car battery while the engine is running?
No. Turn the engine and electrical accessories off before installing or removing a battery. Working with the engine running can create a short circuit and may damage the charging system.
[CodeImg? User says don't give placeholder after FAQ. We must not. No placeholder.]
Conclusion
The safe order to connect car battery cables is positive first and negative second. For removal, disconnect negative first and positive second. With the correct tools, clear terminal checks, secure clamps, and proper safety gear, most battery installations are simple.
Take your time, follow the vehicle manual, and stop if you see heavy sparks, smoke, leaks, or damaged wiring. If your car uses a start-stop system, hybrid technology, or battery monitoring sensor, professional help may be the safest choice.
Use these steps the next time you service your battery, and share your experience or questions with a trusted automotive community.