Check the dipstick on level ground with the engine off and cool, wipe, reinsert, then read.
I’ve spent years maintaining cars and teaching friends simple checks, so I’ll walk you through exactly how to check car oil level correctly. This guide covers tools, step-by-step instructions, common mistakes, how to read the dipstick, when to add oil, and real-life tips from hands-on experience so you leave confident and prepared.
Tools and materials you need before you start
Before you begin, gather these simple items. They make the oil check fast and accurate.
- Clean rag or paper towels to wipe the dipstick
- Flashlight for poor light conditions
- Gloves if you prefer to keep hands clean
- Funnel and correct engine oil type if you need to top up
I always keep a small rag and a flashlight in my glove box. It saves time and keeps the process clean.
Best time and place to check oil
Choosing when and where matters for an accurate reading.
- Park on level ground so oil settles evenly
- Check with the engine off; many cars require the engine to be cool
- For some modern cars, manufacturers recommend checking warm after a few minutes of engine off; consult the owner’s manual
One lesson I learned the hard way was checking after a long drive. Hot oil sticks to components and gives a false low reading. Let the engine cool or wait a few minutes for oil to drain back into the pan.

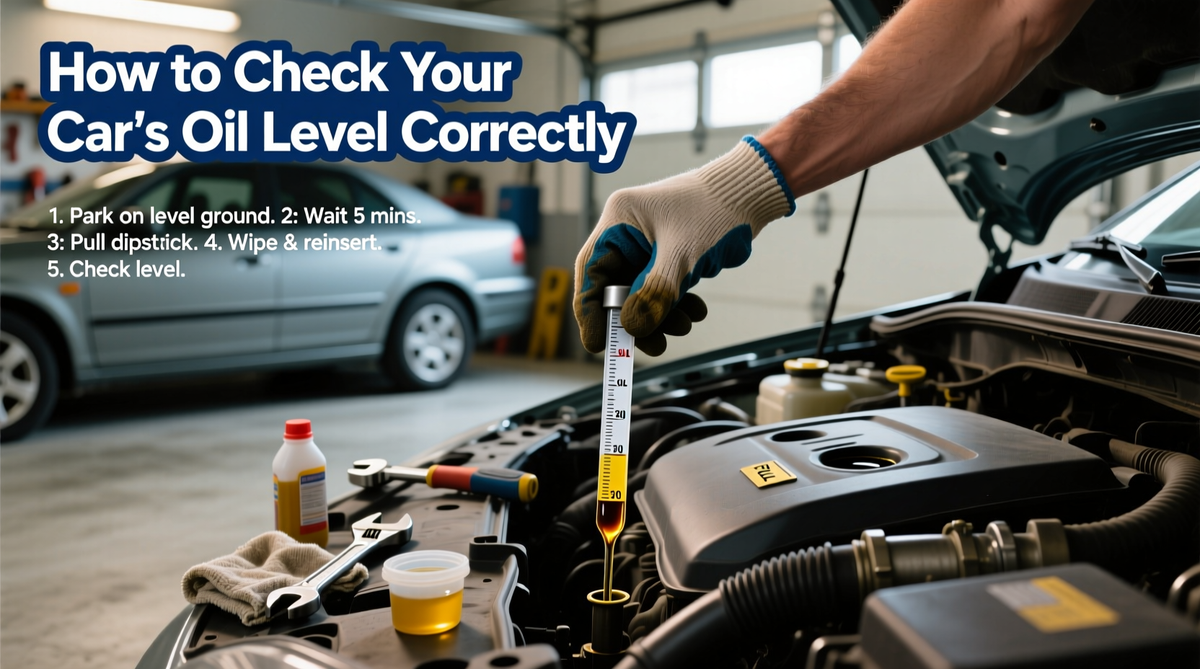
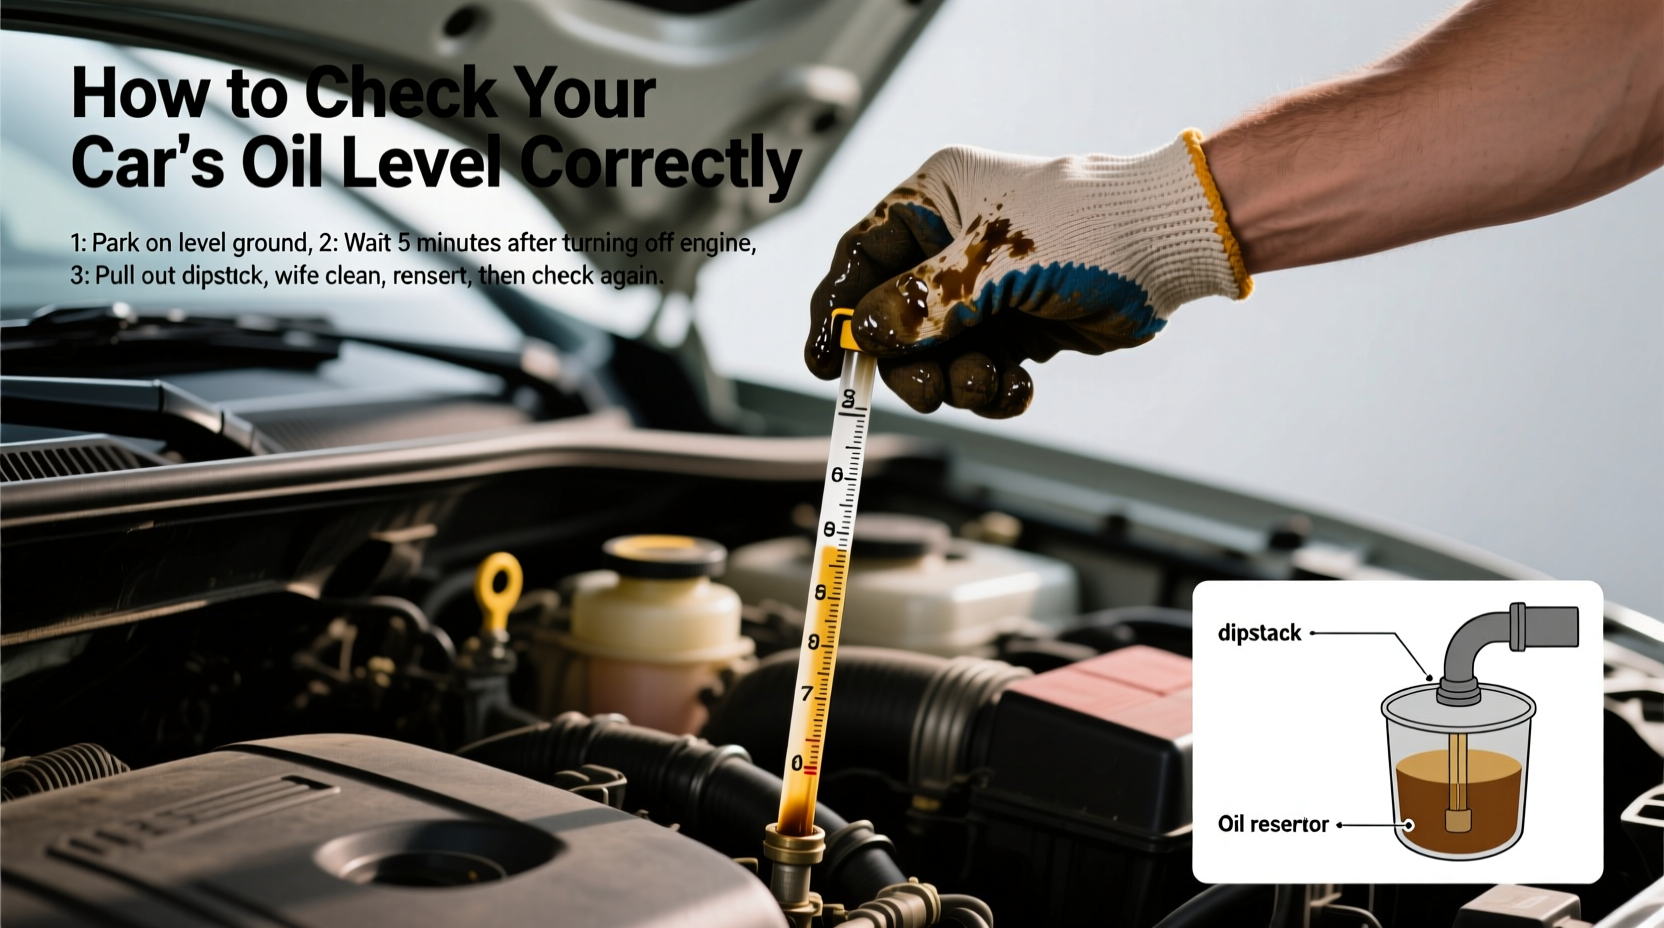
Step-by-step: How to check car oil level correctly
Follow these steps in order for a reliable oil level reading.
- Park the car on a level surface and switch off the engine.
- Pull the parking brake and open the hood.
- Locate the dipstick; it usually has a bright handle.
- Pull the dipstick out and wipe it clean with a rag.
- Reinsert the dipstick fully, then pull it out again.
- Read the oil level at eye level against the dipstick marks.
- Note oil color and texture; fresh oil is amber and clear.
- If low, add a small amount of the recommended oil, wait a minute, and recheck.
I once overfilled because I guessed instead of following step-by-step. Adding oil slowly and rechecking prevents overfilling. This exact routine is how to check car oil level correctly every time.

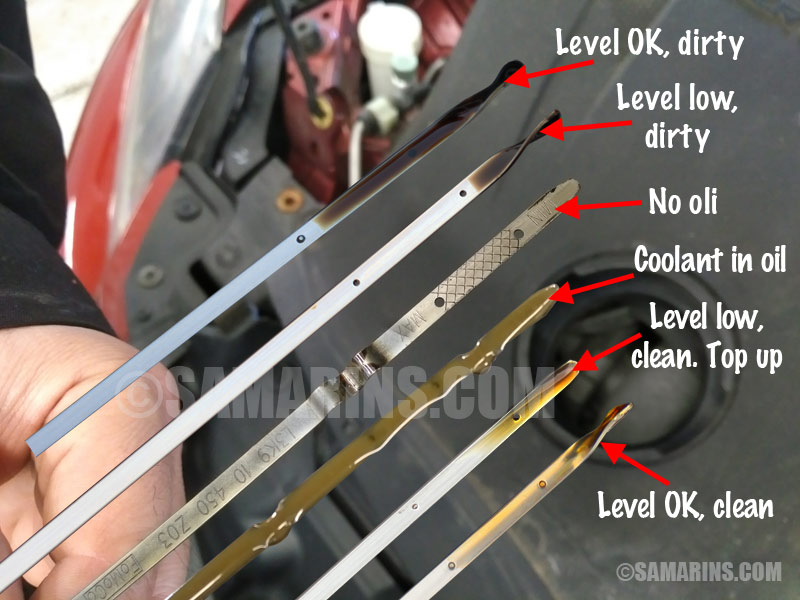
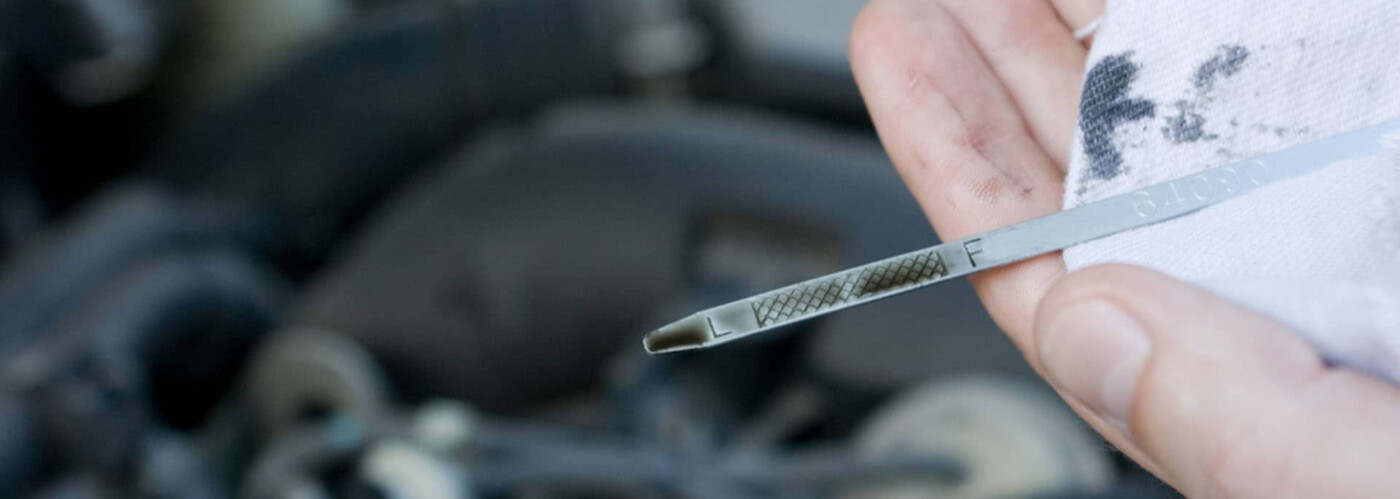
How to interpret dipstick markings and oil condition
Dipsticks vary, but the idea is the same: find the proper range and oil quality.
- Two holes or lines indicate full and low; keep oil between them
- Cross-hatched area usually marks the safe range
- If level is below the low mark, add oil in small increments
- Dark, gritty oil suggests a change is due; milky oil can indicate coolant contamination
Seeing a cloudy, light-brown oil often means coolant mixed with oil. That needs immediate professional attention. Learning how to check car oil level correctly includes noticing oil quality, not just level.

Common mistakes to avoid
Small errors lead to wrong readings or engine damage.
- Checking on a slope gives inaccurate level readings
- Reading while the engine is hot or right after driving can mislead you
- Overfilling the crankcase can cause foaming and oil pressure problems
- Using the wrong oil type reduces engine performance
I used the wrong oil grade once and felt a grind in the engine. Stick to manufacturer specs and avoid shortcuts.

How much oil to add and how to add it safely
If your oil is low, add the right amount carefully.
- Consult your owner’s manual for oil capacity and viscosity
- Add oil in small amounts, about 100 ml (3.4 oz) at a time
- Wait a minute between adds and recheck the dipstick
- Use a funnel to avoid spills on the engine
Adding too much is easier than you think. I prefer to add small amounts and check twice. That habit helps me manage oil level without overfilling.
When to change oil vs. when to top up
Knowing the difference saves money and protects the engine.
- Top up when level is slightly below the full mark and oil condition looks good
- Change oil when it’s dark, gritty, or past the service interval
- Follow mileage or time-based intervals from your owner’s manual
I keep a maintenance log. It reminds me when the last change happened and when to inspect again. That practice supports doing how to check car oil level correctly as part of routine care.
Troubleshooting common issues after checking oil
If something looks wrong after your check, act quickly.
- Oil level keeps dropping: check for leaks or burning (smoke, blue exhaust)
- Oil looks milky: suspect coolant leak and seek repair
- Rapid oil loss between checks: inspect seals, gaskets, and turbocharger if equipped
- Dipstick readings fluctuate: ensure car is on level ground and dipstick is fully seated
Once, I found a slow leak from an oil filter that I replaced incorrectly. Regular checks taught me to spot that early and avoid a costly engine problem.
Frequently Asked Questions of How to check car oil level correctly
How often should I check my oil level?
Check oil at least once a month and before long trips. Vehicles with higher oil consumption may need weekly checks.
Can I check oil right after driving?
It’s best to wait 5–10 minutes after driving for oil to settle; many cars require a cool engine for exact reading.
What if the dipstick shows above the full mark?
Do not drive with overfilled oil; remove excess using a drain or siphon. Overfilling can harm seals and cause foaming.
Does the car have an electronic oil level sensor I can trust?
Electronic sensors are helpful but can fail. Use the dipstick to confirm readings when possible.
What color should engine oil be on the dipstick?
Healthy oil is amber to light brown. Very dark, gritty, or milky oil signals a change or repair is needed.
Conclusion
Regular, careful checks are the simplest and most effective way to protect your engine and extend its life. Use the step-by-step routine above, check on level ground, and add oil slowly when needed. Start today: set a monthly reminder to check your oil, keep a small kit in the car, and share this advice with friends so they learn how to check car oil level correctly. Leave a comment with your own tip or a question, and subscribe for more vehicle maintenance guides.