Use a pump, seat the bead, add sealant if needed, and inflate to the correct PSI.
I’ve fixed dozens of tubeless wheelbarrow tires in my workshop and on the job. This guide explains how to inflate a tubeless wheelbarrow tire safely and reliably. You’ll learn the tools, step-by-step method, common problems, and maintenance tips so you can get your wheelbarrow back to work fast. Read on for clear, practical steps drawn from real experience and industry best practice.

Understanding tubeless wheelbarrow tires
Tubeless wheelbarrow tires do not use an inner tube. The tire and rim form an airtight seal at the bead. That seal holds air inside the tire. Tubeless tires often use liquid sealant to seal small holes automatically.
Why choose tubeless for a wheelbarrow:
- Better puncture resistance when sealant is used.
- Fewer pinch flats from heavy loads.
- Lower rolling resistance on some soil types.
- Easier to repair small punctures on the spot.
Common causes of low air:
- Slow leaks from bead or valve.
- Punctures too large for sealant.
- Damaged or corroded rim.
- Old or hardened sealant that no longer seals.
Signs your wheelbarrow has a tubeless flat:
- Tire looks flat under load.
- Hissing sound near bead or valve.
- Wheelbarrow drags or tilts when pushed.
From my experience, many flats come from old sealant drying out. Replacing or topping up sealant yearly prevents most slow leaks.

Tools and supplies you need
Gather these items before you start inflating. They save time and reduce frustration.
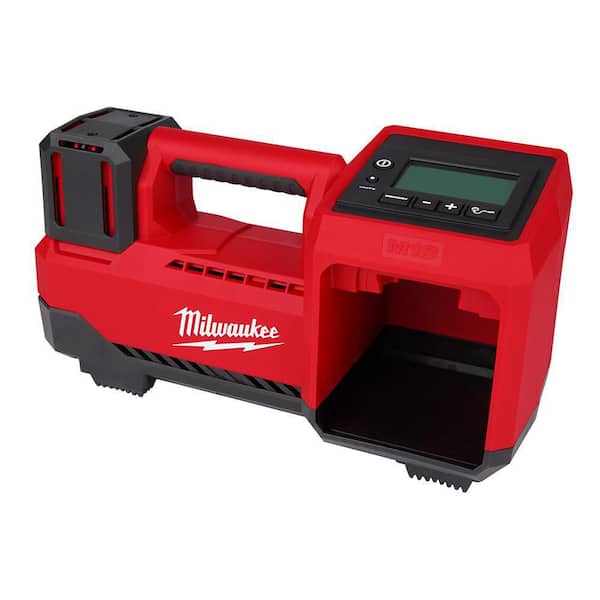
- Air pump or compressor with a thumb-lock chuck or quick-connect fitting.
- Floor pump with a high-volume head (for manual inflation).
- Tubeless valve stem and valve core tool.
- Tire sealant rated for tubeless tires.
- Soapy water in a spray bottle to check leaks.
- Tire levers (plastic) and rim cleaner.
- Rag and gloves for cleanliness.
- Pressure gauge suitable for low PSI ranges (0–50 PSI).
Optional but helpful:
- A compressor with a tank to deliver a quick air burst.
- A bead seating tool or inflator that gives a short, high-volume pulse.
- Replacement rim tape if the rim is not airtight.
I keep a compact tubeless repair kit in my truck. That kit has saved many jobs when sealant couldn’t handle a larger puncture.

Step-by-step: how to inflate a tubeless wheelbarrow tire
Follow these steps in order. Read all steps once before starting.
- Inspect rim and tire
- Remove the wheel from the wheelbarrow.
- Clean the rim bed and check rim tape for damage.
- Look inside the tire for obvious cuts or debris.
- Remove valve core and add sealant
1. Use the valve core tool to remove the core.- Pour the recommended amount of sealant into the tire through the valve or through the bead before seating.
- Seat the bead
- Lay the tire so the valve is at the 12 o’clock position.
- Push the bead onto the rim as evenly as you can by hand.
- Inflate to seat the bead
- Reinsert the valve core snugly if you used the valve to add sealant.
- Use a compressor or high-volume pump to quickly inflate. A short burst of air helps the bead snap into place.
- If using a floor pump, use steady strong strokes until the bead seats.
- Check pressure and listen
- Inflate to the recommended PSI for the tire. Many wheelbarrow tires run low, around 15–30 PSI. Check the tire sidewall for the exact range.
- Spray soapy water around the bead and valve to find leaks.
- Rotate and let sealant settle
- Shake or rotate the wheel to distribute sealant.
- Let the wheel sit for 10–15 minutes and recheck pressure.
- Refit the wheel and final check
- Put the wheel back on the wheelbarrow.
- Test with a light load and check for slow pressure loss over 24 hours.
Practical tips from experience:
- Using a compressor tank helps seat the bead in one quick burst. Small compressors may leak air too slowly.
- If the bead refuses to seat, tap the tire near the bead with a rubber mallet while inflating. This helps the bead snap into place.
- Avoid overinflating beyond the tire sidewall rating to seat the bead. Only use short bursts and then lower to recommended PSI.

Troubleshooting common problems
Bead won’t seat
- Cause: Low air volume or dirty bead/rim.
- Fix: Clean bead and rim. Use a compressor tank or a tubeless inflator to provide a quick pulse of air.
Tire loses air slowly
- Cause: Dry sealant, small puncture, or valve leak.
- Fix: Add fresh sealant and tighten or replace the valve core. Use soapy water to pinpoint the leak.
Large puncture or gash
- Cause: Sharp object or sidewall damage.
- Fix: Temporary plug may work, but replace the tire if the damage is on the sidewall or too large for a plug.
Valve stem issues
- Cause: Corrosion or improper seating.
- Fix: Remove and inspect rim tape and valve. Replace the tubeless valve stem if it wobbles or leaks.
Rim tape failure
- Cause: Old or torn tape allow air to escape from spoke holes.
- Fix: Remove tire, clean rim, and apply new airtight rim tape rated for tubeless use.
When I was starting out, I once tried seating a bead with only a hand pump and failed repeatedly. After switching to a cordless inflator with a tank, the bead snapped in instantly. The lesson: volume and speed matter when seating tubeless wheelbarrow tires.

Maintenance and prevention
Keep tubeless wheelbarrow tires healthy with simple checks.
- Check pressure weekly when in heavy use.
- Top up sealant annually or every 6 months in hot climates.
- Clean rims and replace rim tape when you see corrosion.
- Store the wheelbarrow in shade to slow sealant breakdown.
- Replace tires that show deep cuts, splits, or excessive tread wear.
Benefits of regular maintenance:
- Fewer unexpected flats on the job.
- Longer tire life.
- Better load handling and fuel (effort) efficiency.
Limitations to note:
- Sealant won’t fix large sidewall cuts.
- Some rims are not tubeless-ready; conversion may require new rim tape or parts.
- Very low PSI can increase rim damage if wheelbarrow hits sharp edges.
A tip from the field: keep a small bottle of sealant and a mini pump in your shed. Topping up sealant took me five minutes and saved a trip to the shop.

Frequently Asked Questions
How much air should I put in a tubeless wheelbarrow tire?
Most wheelbarrow tires run between 15 and 30 PSI, but check the sidewall for the exact range. Inflate to the manufacturer’s recommended PSI based on the load you plan to carry.
Can I use a regular bike pump to inflate a tubeless wheelbarrow tire?
You can use a floor pump if it has enough volume, but seating the bead often needs a quick, high-volume burst that some pumps cannot deliver. A compressor or tubeless inflator makes seating faster and more reliable.
Will tubeless sealant fix every puncture?
Sealant will seal many small punctures and slow leaks, but it won’t fix large gashes or sidewall damage. For large holes use a repair plug or replace the tire.
How often should I replace tubeless sealant?
Replace or top up sealant at least once a year, or every six months in hot, dry climates. Old sealant can dry and stop sealing effectively.
What if the bead keeps unseating under load?
This may be due to damaged rim tape, an incompatible rim, or low PSI. Inspect the rim, replace tape if needed, and ensure you use the correct tire and PSI for your rim.
Can I convert a standard wheelbarrow rim to tubeless?
Many rims can be converted with proper tape and tubeless valves, but some rims are not tubeless-friendly. Check compatibility before converting.
Is it safe to use sealant with the valve core removed?
Yes, removing the valve core allows easier sealant insertion and faster seating, but reinsert the core and check tightness before final inflation.
Conclusion
You can reliably inflate a tubeless wheelbarrow tire by cleaning the rim, adding sealant, seating the bead with a quick air burst, and inflating to the recommended PSI. Regular checks and sealant top-ups prevent most flats and keep your wheelbarrow ready for work. Try the steps here on your next flat and you’ll save time and money. If this guide helped, subscribe for more practical how-to tips, or leave a comment with your questions or repair stories.