Inflate tubeless tires by seating the bead with a high-volume pump or compressor and adding sealant.
I’ve spent years fixing flat tires on the trail and in the shop. This guide on how to inflate tubeless bike tires walks you through tools, step-by-step setup, common problems, and real tips I learned the hard way. Read on and you’ll gain the confidence to seat rims, top up sealant, and get rolling fast without a trip to the bike shop.

Why choose tubeless tires and what to expect
Tubeless tires cut punctures and lower rolling resistance. They use sealant to plug small holes. You can run lower pressure for better traction without frequent flats. Learning how to inflate tubeless bike tires gives you control over setup and on-road fixes.
My experience: switching to tubeless saved me multiple rides that would have ended with patching or tube swaps. Expect some trial and error on first installs. Once you know the routine, inflation is quick and tidy.

Tools and materials you need
Gather these items before you start. Having everything on hand makes the process smooth.
- Tubeless-ready rim and tire
- Tubeless valve and core remover
- Sealant (amount depends on wheel size)
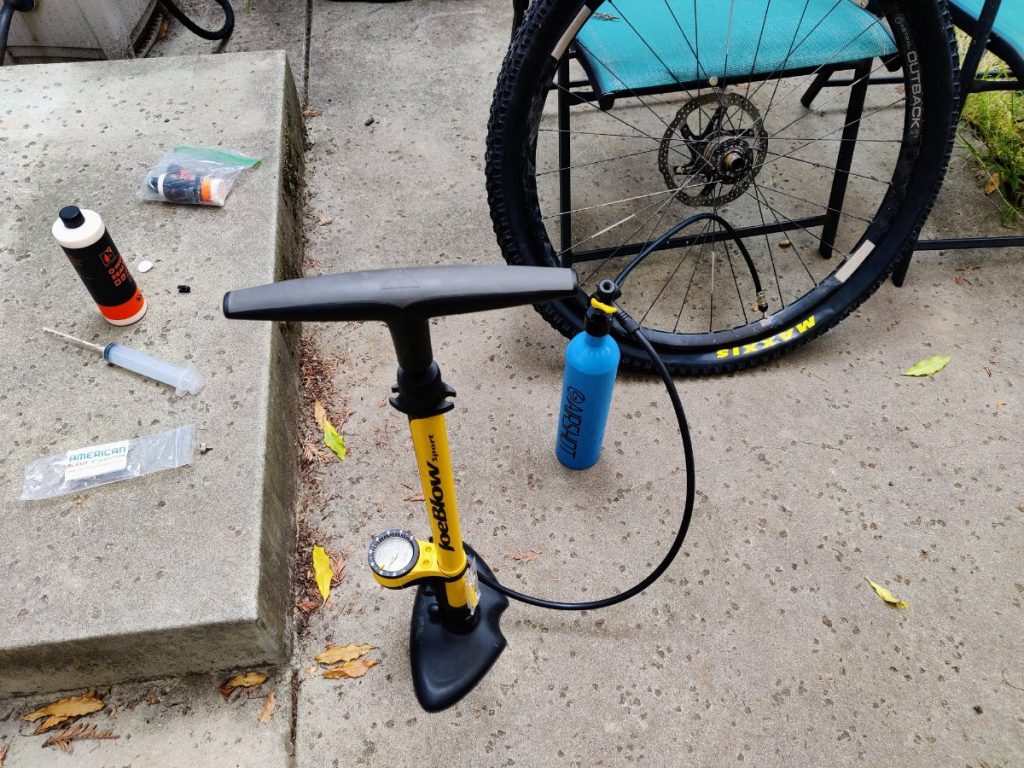
- High-volume floor pump or tubeless booster
- Compressor or electric air source (optional but useful)
- Soapy water in a spray bottle (for bead seating check)
- Rag and gloves for sealant cleanup
- Tire levers (plastic, only if needed)
- Pressure gauge
Make sure the rim tape is correct and the valve hole is sealed. Small mistakes here cause leaks and wasted time.
Step-by-step: how to inflate tubeless bike tires
This step-by-step will teach you how to inflate tubeless bike tires on most rims. Follow each step slowly. Check fit as you go.
- Inspect rim and tire
- Clean the rim bed. Check rim tape for gaps. Confirm tire is tubeless-ready.
- Install valve and add sealant
- Push the tubeless valve through the rim. Tighten the valve base snugly. Remove valve core if using a compressor for faster seating.
- Pour the recommended sealant amount into the tire through the valve or the bead opening. Typical amounts: 30–60 ml for road; 60–120 ml for mountain.
- Mount one bead, then the other
- Mount one bead fully. Work the second bead on until it sits in the rim channel. Leave a small gap by the valve if adding sealant through the valve.
- Seat the bead with air
- Reinstall the valve core if you removed it. Use a high-volume floor pump, tubeless booster, or compressor to seat the bead. A sharp, high-volume burst of air usually snaps the bead into place.
- If using a compressor, short bursts work best. If using a floor pump, pump fast and steady. A tubeless booster stores pressure and releases it quickly; it’s very effective.
- Check for seating and leaks
- Listen for two quick pops as each bead seats. Spray soapy water around the bead and valve. Look for bubbles.
- Ride gently for a few miles and re-check pressure and sealant distribution by rotating the wheel.
- Final air pressure and valve care
- Set the pressure to your preferred riding psi. Tighten the valve core and cap. Wipe excess sealant.
Common variations
- Using a tubeless inflater: Many riders use a tubeless inflater or booster when a floor pump won’t seat the bead.
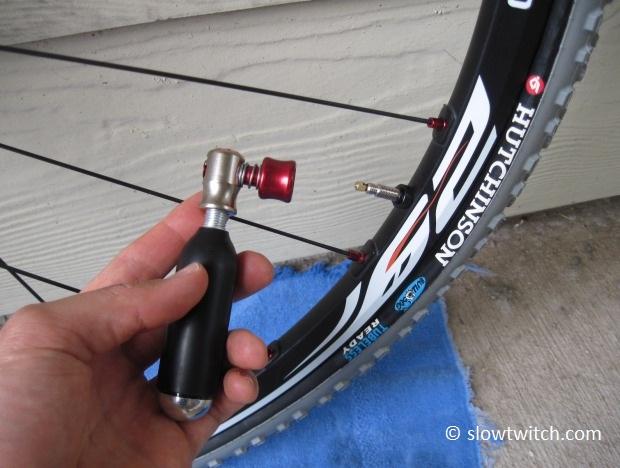
- Using CO2: CO2 cartridges can seat a bead on some rims but may not hold long due to small leaks. Add sealant and top up with a pump.
How to inflate tubeless bike tires on deep rims
- Deep rims may need higher initial pressure or a booster. Remove valve core for maximum flow when seating.
Personal tip: I always carry a small hand pump and a spare valve core on long rides. Once, a stubborn bead needed a booster; the one I borrowed saved the day.

Troubleshooting common issues when inflating tubeless bike tires
Even with care, problems happen. Here are quick fixes for common failures.
Tire won’t seat
- Check rim tape and bead condition. Remove the valve core and blast air with a compressor or booster. Use a soapy spray to help the bead slip into place.
Slow leak after seating
- Rotate wheel to spread sealant. Add 10–20% more sealant. Check for spoke holes or damaged tape.
Burping or air loss under load
- Make sure bead is fully seated and rim bed is clean. Increase tire volume or consider rim strips. Lowering pressure too much increases burping risk.
Messy sealant at the valve
- Tighten the valve core. Replace old cores. Clean and dry the valve base and threads. Use the correct valve length.
Safety note: avoid using too much pressure to seat beads. Excessive pressure can damage rims or cause injury.
Maintenance and safety tips
Routine care keeps your tubeless setup reliable.
- Check sealant every 2–6 months depending on climate and mileage.
- Inspect tire for deep cuts. Remove embedded debris promptly.
- Replace valve stems and cores if they show corrosion.
- Keep a small kit: sealant, valve core tool, spare core, and a mini pump.
- If you swap tires often, mark sealant dates. Older sealant may clump and fail.
From my shop days: I learned to add a splash of sealant before long rides. That small step avoids many roadside stops.

Frequently Asked Questions of how to inflate tubeless bike tires
How much sealant should I use for tubeless tires?
Amounts vary by wheel and tire size. Use 30–60 ml for road tires and 60–120 ml for mountain tires; add more in puncture-prone areas.
Can I seat a tubeless tire with a regular floor pump?
Yes, many tires seat with a high-volume floor pump. If the bead won’t snap, use a tubeless booster or compressor for a quick air burst.
Is it safe to use CO2 to seat tubeless tires?
CO2 can seat a bead on some rims but may not seal small leaks. Always add sealant and top up pressure with a pump after using CO2.
Why does my tubeless tire lose air overnight?
Common causes are slow punctures, inadequate sealant, or leaking bead. Rotate the tire to redistribute sealant and inspect for cuts or bad tape.
Do all rims need tubeless tape to inflate tubeless tires?
Yes. Proper tubeless tape ensures the rim bed is airtight. Use the correct width and ensure no gaps or wrinkles when applying.
Conclusion
Learning how to inflate tubeless bike tires is a useful skill that saves time and keeps you riding. Follow the steps: check rim prep, add sealant, seat the bead with the right air source, and test for leaks. Practice once or twice at home. You’ll get fast and confident. Try these tips on your next setup, leave a question below, or share your own trick to help other riders.